Azure Account Setup for use with Liberty STT Facilities
Configuring an Azure Account for Liberty Speech-to-Text
Liberty Speech-to-Text facilities make use of the Microsoft Azure Speech-to-Text Engine. Therefore client accounts using these facilities must have an Azure account that is configured appropriately and that includes the required Azure services. Take the steps described below to create and configure an Azure account that can be used with the Liberty Speech-to-Text facilities.
Use of the Azure Speech-to-Text Engine requires the Microsoft Cognitive Speech Services dll. Download the dll from this link and unzip it and then save the dll into the same folder as either the Post Recording Manager service program or the Liberty Closed Captioning program is installed.
Finally, the Microsoft Visual C++ Redistributable must also be installed on the computer calling the Azure services. Follow this link to the Microsoft site to obtain the Redistributable applicable to your Operating System.
Steps to Create and Configure an Azure Account
Step 1: Logon to Azure
Go to the Azure website and logon with your Microsoft id and password.
Step 2: Add a Subscription
Add a Subscription to the account that will be used to pay for Azure services. A suggested subscription is the Pay-As-You-Go type subscription. Such a subscription will break down use of the Azure services into monthly payments.
Step 3: Add a Resource Group
Resource Groups are containers into which Resources, representing Azure services such as Speech-to-Text conversion and storage, are added. Add a Resource Group with a suitable name to contain the Resources that will be created in the next two steps.
Step 4: Add a Resource for Azure Storage
Under Azure services, click on Storage accounts to create a Resource for Azure storage. List All Services if needed to find the storage resource service. The storage Resource that is created must be associated with the same Resource Group that will also later be used for the Speech-To-Text Resource. See the Azure Storage screen capture below showing the Azure storage properties.
- The webpages will step you though various configuration settings. So be sure to note that the following storage resource properties must be changed from their default values.Redundancy: Locally-redundant storage (LRS) must be selected
- Enable soft delete for blobs: must be turned off (Disabled)
- Enable soft delete for containers: must be turned off (Disabled)
- Enable soft delete for file shares: must be turned off (Disabled)
In the Azure Storage screen, in the left column, note the Access Keys tab. This is where both the storage Account Name and associated access key(s) can be found that are later entered into Post Recording Manager.

Step 5: Add a Resource for Speech to Text Services
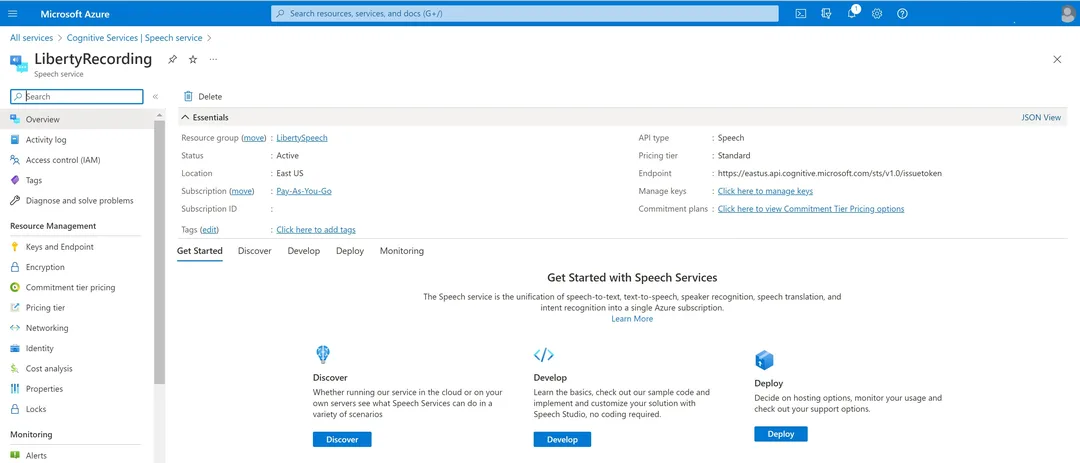
Under Azure services, and under AI + machine learning click on Speech Services and create a Speech Services Resource. The Speech Services Resource that is created must be associated with the same Resource Group that has the associated Azure storage. See the Azure Speech screen capture below for the service properties.
Also in the Azure Speech screen capture, note the Manage keys link. Following the Manage Keys link will display the keys used to access the Azure Speech-to-Text facilities. These keys must later be input into Post Recording Manager or the Liberty Closed Captioning facility.
Configuring Post Recording Manager and the Liberty Closed Captioning Facility
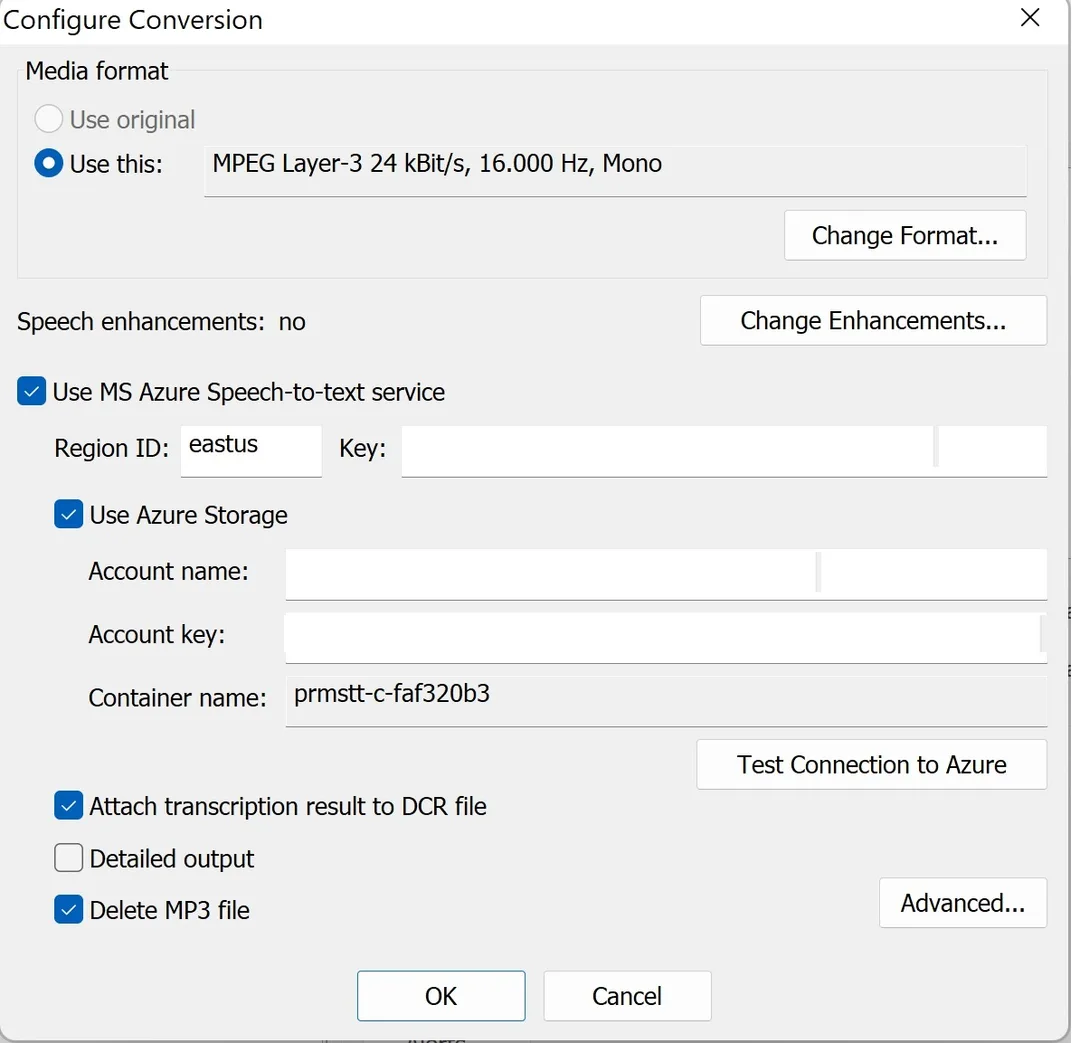
In Post Recording Manager, in the Speech-To-Text services configuration, the Azure Region ID and an Azure Speech-to-Text key must be specified. In the Post Recording Manager Azure Storage configuration, the Azure Storage Account Name and the associated key must be specified. See the screen capture below.
Advanced Speech-to-Text Options
The "Advanced" Speech-to-Text settings allow a site some degree of customization over how the audio will be processed by the Speech-to-Text engine. Click the "Advanced" button to open the dialog Window shown below.
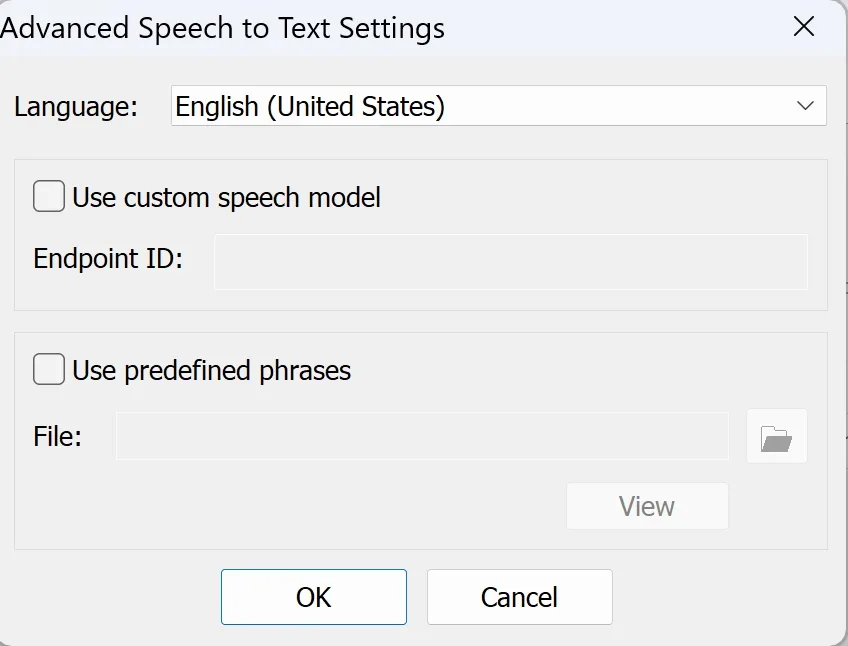
- Language: Support for some additional languages or local accents is provided.
- Use Custom Speech: identifies an Endpoint ID on the Azure site. Clients must create and configure a Custom Speech model on the Azure site and enter the Endpoint ID of the model into the text field.
- User predefined phrases: allows for identification of a list of phrases that will improve the Speech-to-Text engine accuracy. Adding a phrase into a list increases its prominence, thus making it more likely to be recognized. Examples of what might be included in the list of phrases are:
- Proper Names
- Geographic Locations
- Homonyms
- Words or acronyms unique to a specific industry or organization
- Phrase List Requirements
- The phrase list file must be created using the Notepad editor in W10 or W11.
- (Since Win 10, the default Notepad encoding is UTF-8 and the STT facility requires UTF-8 format.)
- Each phrase must start on a new line.
- There are a maximum of 500 phrases that can be specified.
- The file must be on a drive that is local to the service.
A note about the Liberty Closed Captioning Facility
In the Liberty Closed Captioning facility configuration, only the Azure Region ID and an Azure Speech-to-Text key need be specified. The Liberty Closed Captioning facility does not use Azure Storage.